How to Draw the Taj Mahal Drawing
Learn to draw the beautiful Taj Mahal for kids and beginners, in a few simple steps.
Along the way, discover its history and some fascinating facts about this world-famous monument.
Difficulty Level: Medium
Time Needed: At least 2 Hours
Material Needed:
Pencil & Eraser – for sketching the outlines and correcting any small mistakes.
Drawing Paper – Use plain white A4 or a page from your sketchbook for best results.
Ruler – to draw straight lines for the base, platform, and minarets accurately.
Black Marker or Fine Liner – for outlining the final structure neatly.
Sharpener – is necessary to keep your pencil sharp and ready for detailed work.
Colors – you can use sketch pens, colored pencils, or crayons.
Colors to Use:
White or Light Grey – for the Taj Mahal structure and dome.
Blue – for the sky and water reflection.
Green – for trees, grass, and garden areas.
Brown – for the tree trunk.
Yellow – for the sun.
Black – for window outlines and shadows.
History of the Taj Mahal
The Great Taj Mahal stands in Agra, a city in the Indian state of Uttar Pradesh.
Mughal Emperor Shah Jahan (Shahab-Ud-Din Muhammad Khurram) ordered its construction in memory of his beloved wife, Mumtaz Mahal. He was the son of Emperor Jahangir and one of the most powerful Mughal rulers.
Ustad Ahmad Lahori designed the monument and regarded it as his finest work. About 20,000 skilled workers, artists, and craftsmen from Central Asia, Iran, Afghanistan, and Iraq helped build it.
Since its completion, the Taj Mahal has stood as a masterpiece of Mughal architecture, seamlessly blending Islamic, Persian, and Indian design elements. Crafted from pristine white marble, locally known as sang-e-marmar, it was sourced from the famous Makrana mines in Rajasthan. In 1983, UNESCO recognized the monument as a World Heritage Site, and it continues to be celebrated as one of the Seven Wonders of the World.
Interesting Facts about the Taj Mahal
- The Great Taj Mahal changes color throughout the day, making it one of the most unique and beautiful monuments in the world.
It appears pinkish in the very morning, milky white in the mid-evening, and golden under the moonlight. - The construction required the assistance of around 1,000 elephants in moving the huge stones.
- The four minarets around the Taj Mahal tilt slightly outward. This design makes sure that they will fall away from the main dome rather than onto it in the event of an earthquake.
- Many believe that Shah Jahan planned to build a Black Taj Mahal made of black marble on the opposite side of the Yamuna River.
Step-by-Step Instructions To Draw The Taj Mahal
The final result of our Taj Mahal Drawing will look something like this:
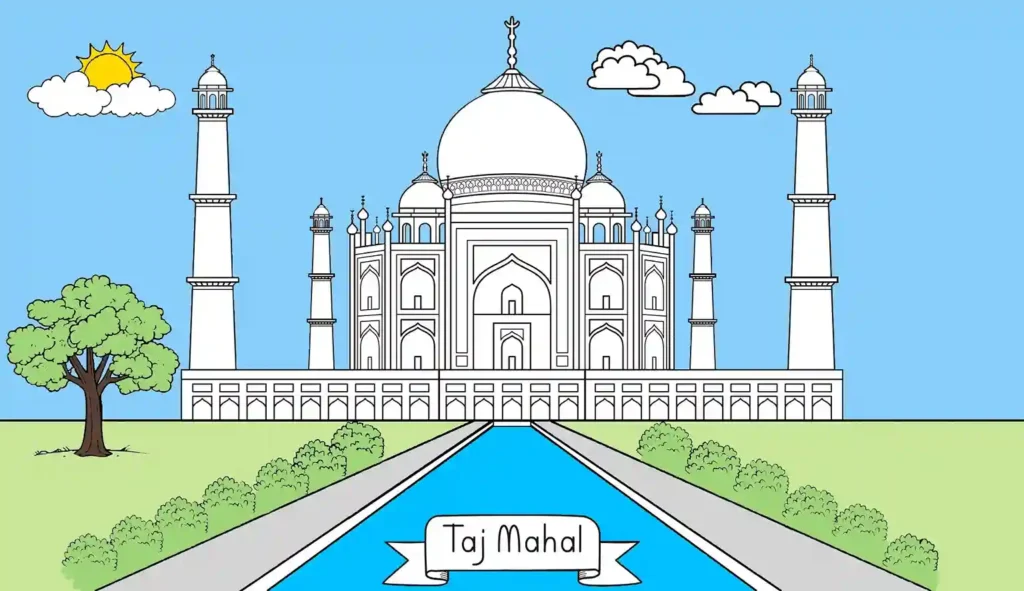
Download drawing PDF for Free, Learn and Draw Taj Mahal with help of easy Instructions
Step 1: Draw the Base Platform of the Taj Mahal
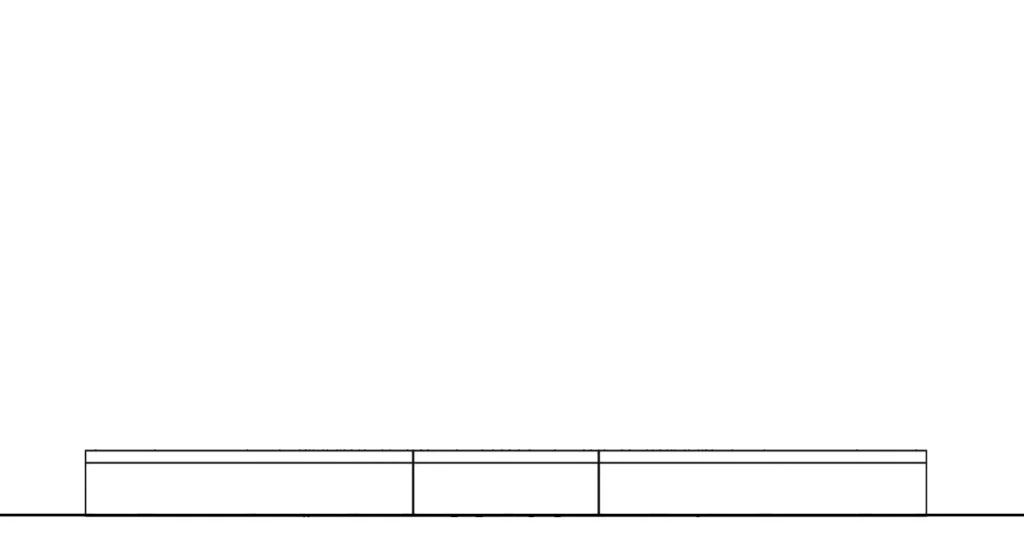
Draw a long horizontal rectangle near the bottom of your page — this will be the main base of the Taj Mahal.
Divide the rectangle into three equal sections with two vertical lines.
Use a ruler to keep all lines straight and neat.
Raise the rectangle slightly above the ground line to show the elevated platform.
To make adjustments later, it’s important to use light pencil strokes
Step 2: Design the Foundation of the Taj Mahal
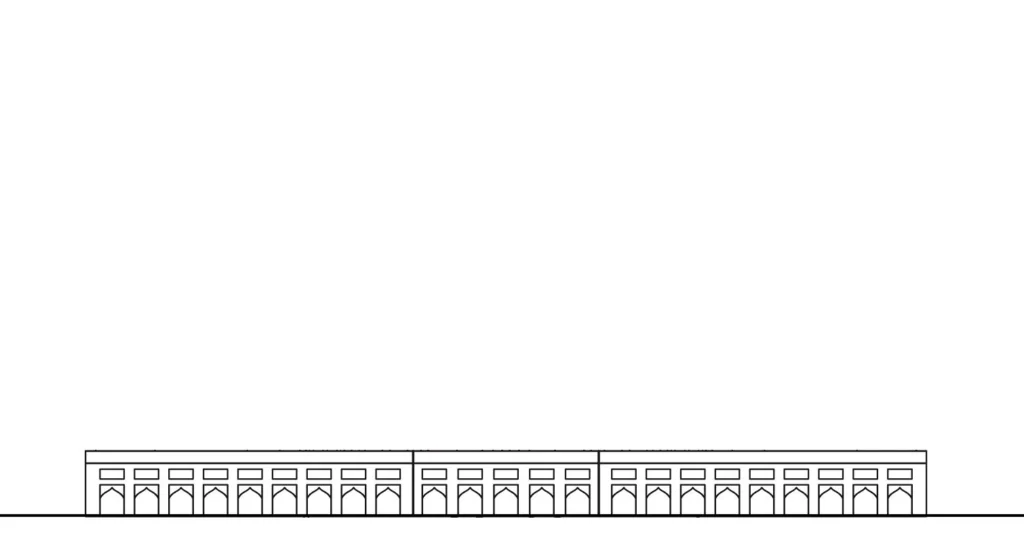
Above the base you drew earlier, create a series of small arches along the length of the platform.
Make each arch identical in shape and size to keep the symmetry balanced.
Draw a small rectangular box above each arch to form the decorative window pattern.
Continue these arches and rectangles across the full width of the platform.
Keep the lines even and neat for a clean architectural look.
Use a ruler to maintain proper spacing between each arch and box.
Step 3: Draw the Central Frame of the Taj Mahal
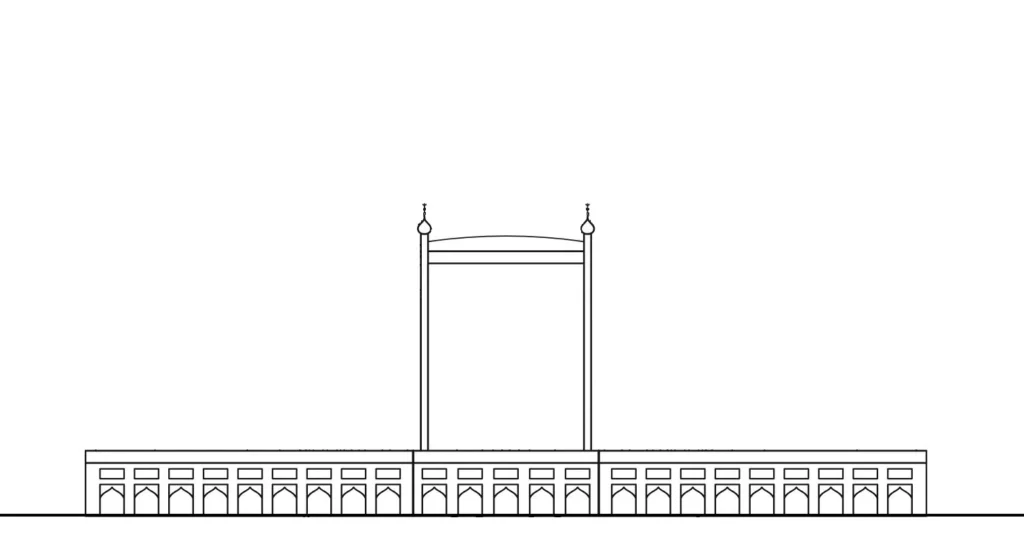
From the center of the base, draw two tall vertical lines extending upward to form the main wall.
Connect their tops with two horizontal lines, leaving a small gap between them.
Create a smooth curve between the bars to define the upper section of the main entrance.
Add a small dome ornament to the top of each pillar to finish the decoration.
Keep both sides symmetrical and well-balanced.
Use light pencil strokes first, then darken them once you’re satisfied with the shape.
Step 4: Draw the Main Dome of the Taj Mahal
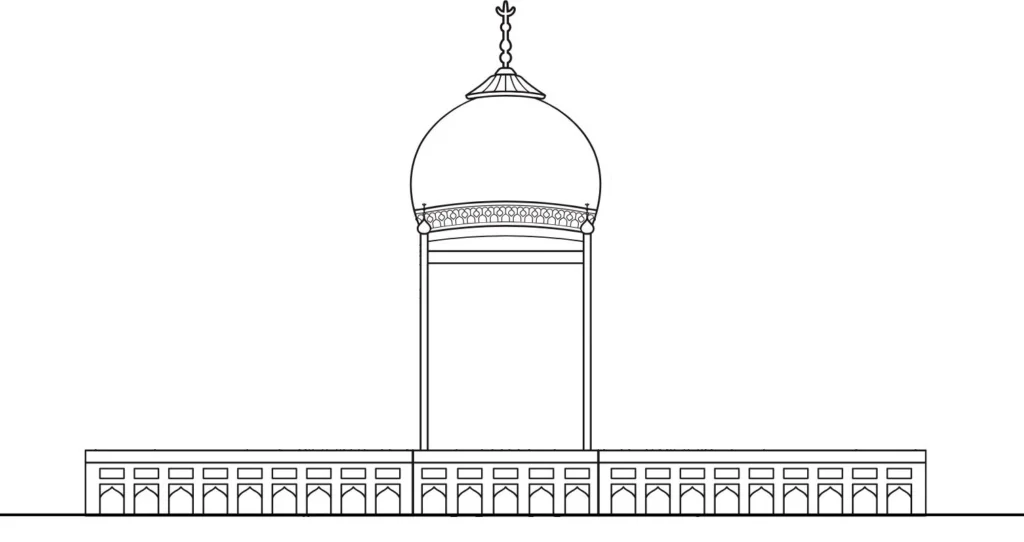
Begin by drawing a large curved dome on top of the central frame you created earlier.
Keep the curve smooth and symmetrical to match both sides evenly.
Add a thin circular baseline below the dome to show where it connects to the pillars.
Draw a decorative border pattern along the bottom of the dome for detailing.
On top of the dome, sketch a small pointed cap with a spire (finial) extending upward.
Include a few lines and shapes on the cap to make it look realistic and detailed.
Please review the entire dome to ensure it looks balanced and properly centered.
Step 5: Draw the Side Pillars Around the Main Dome
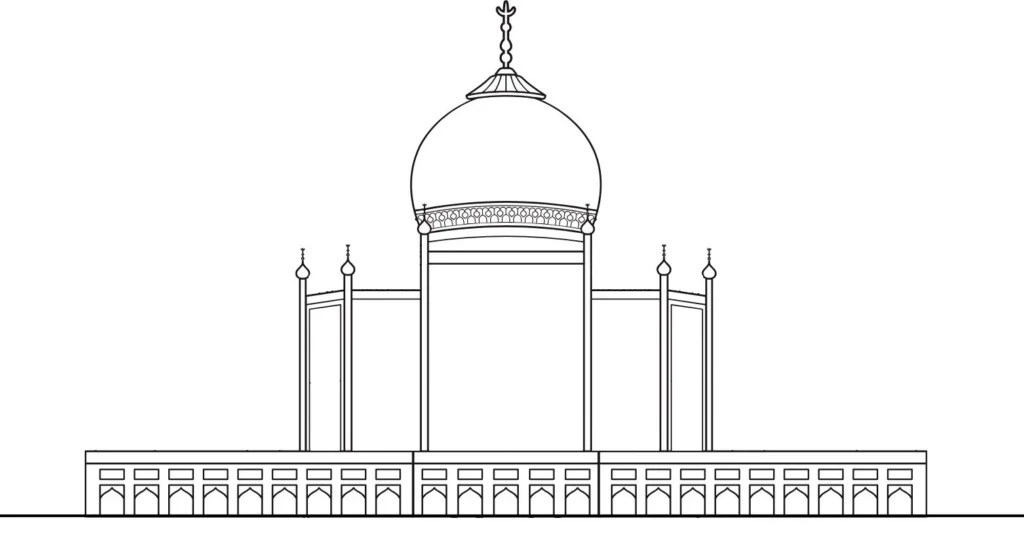
Draw two tall, slender pillars on either side of the main dome that are slightly shorter than the central one.
Ensure the pillars are evenly spaced and aligned with the main structure.
Add small domes with tiny spires on top of each pillar for detail.
Connect the pillars to the main wall with curved lines forming small arches.
Keep all lines straight and proportions even to maintain symmetry.
Check the overall balance — both sides should appear equal and harmonious.
Step 6: Add Details to the Main Walls and Side Pillars
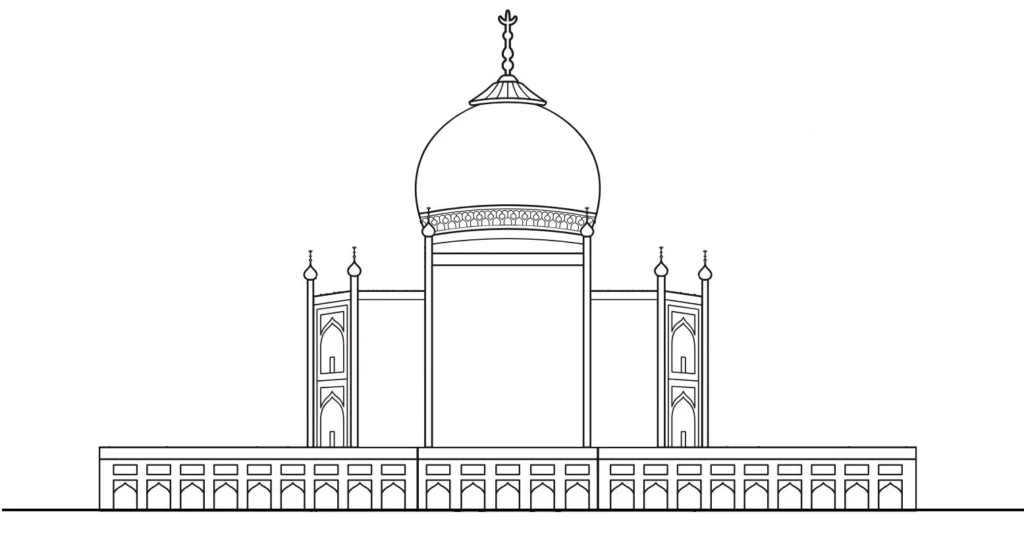
Inside each tall side pillar, draw a large arched doorway shape to add inner depth.
Add a smaller arch inside the large one for double-layer detailing.
Sketch tiny rectangular windows above the arches to match the Taj Mahal’s real pattern.
Keep both sides identical and evenly aligned with the center structure.
Draw thin vertical lines on the pillars to show their architectural divisions.
Review all the new details to make sure the symmetry looks perfect and clean.
Step 7: Add Details to the Central Structure of the Taj Mahal
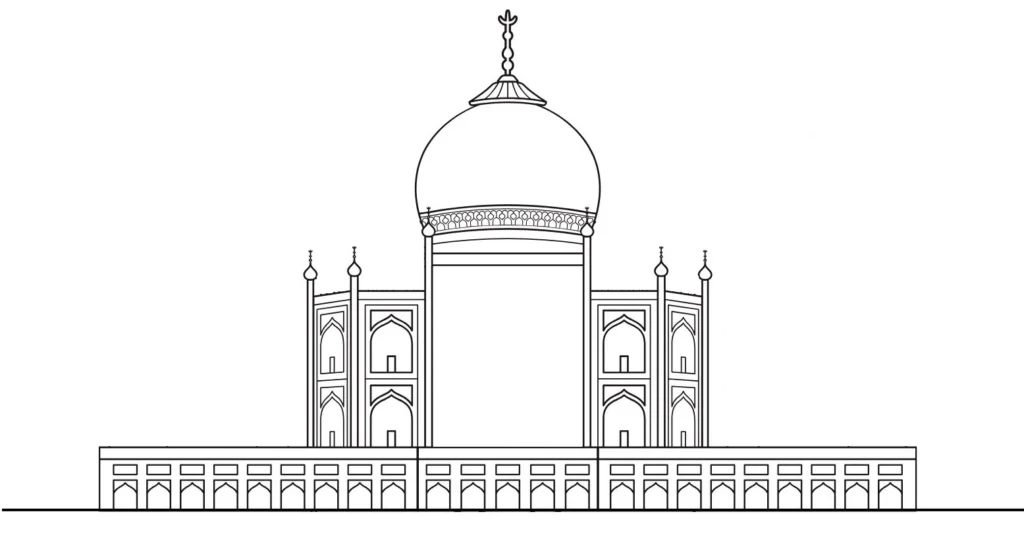
Inside the central wall area, draw a large pointed arch to form the main doorway.
Add a smaller arch inside the big one for depth and elegant design.
Above the large doorway, draw two smaller arched windows for symmetry.
Continue with this same pattern on both sides of the central dome section.
Ensure that all arches are evenly spaced and aligned with the dome’s center.
Keep your pencil strokes light and smooth to maintain a clean structure.
Step 8: Refine the Central Doorway and Add Inner Details
Inside the large central arch, draw another smaller pointed arch to enhance the depth.
Create a rectangular doorway inside this smaller arch to form the main entrance.
Add a tiny window or mini-arch above the doorway for fine architectural detail.
Outline the upper border of the main arch with a smooth, curved line for definition.
Repeat similar small arches and rectangular shapes on both sides for symmetry.
Check alignment carefully to ensure the center and side arches stay perfectly balanced.
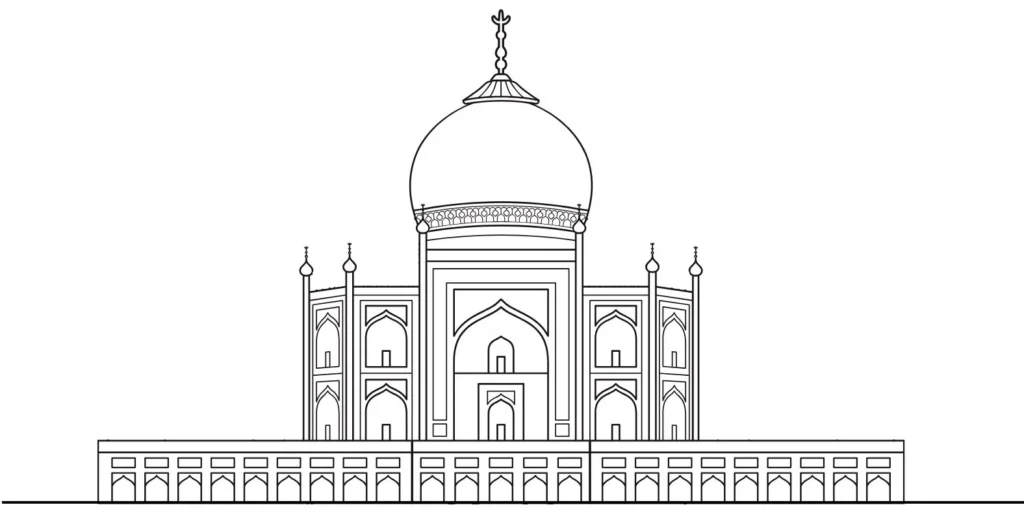
Step 9: Draw the Four Small Domes Around the Main Dome
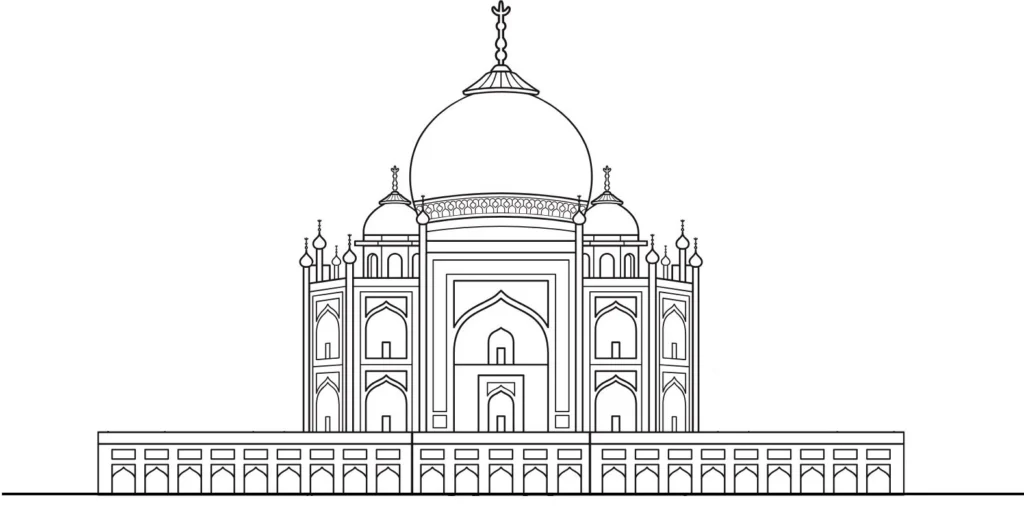
- On each side of the main dome, draw two smaller domes — one on the left and one on the right.
- Keep the domes equal in size and aligned with the main structure for balance.
- Add small circular bases under each dome to connect them smoothly to the roof.
- Draw a thin spire or decorative tip on top of each small dome.
- Make sure the spacing between the domes and the main dome looks even and symmetrical.
- Lightly refine all outlines to keep the structure neat and accurate.
Step 10: Draw the First Minaret of the Taj Mahal
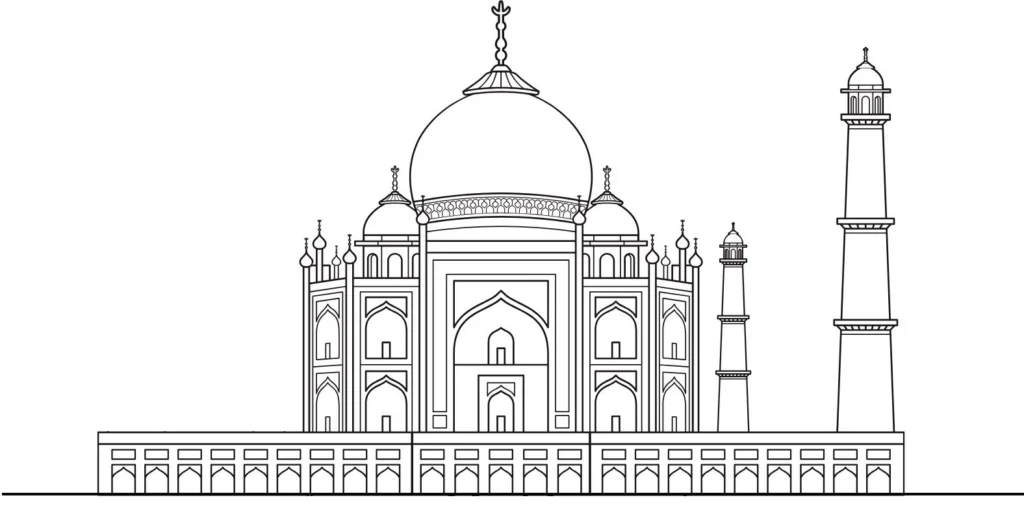
On the right side of the Taj Mahal, draw a tall cylindrical tower starting from the base platform.
Divide the tower into three main sections using thin horizontal lines.
At the top of the tower, draw a small dome with a pointed spire for decoration.
Add tiny arched openings near the top section to create window-like details.
Use light strokes first to maintain proportion with the main building.
Ensure the tower is perfectly vertical and aligned with the structure below.
Step 11: Draw All Four Minarets of the Taj Mahal
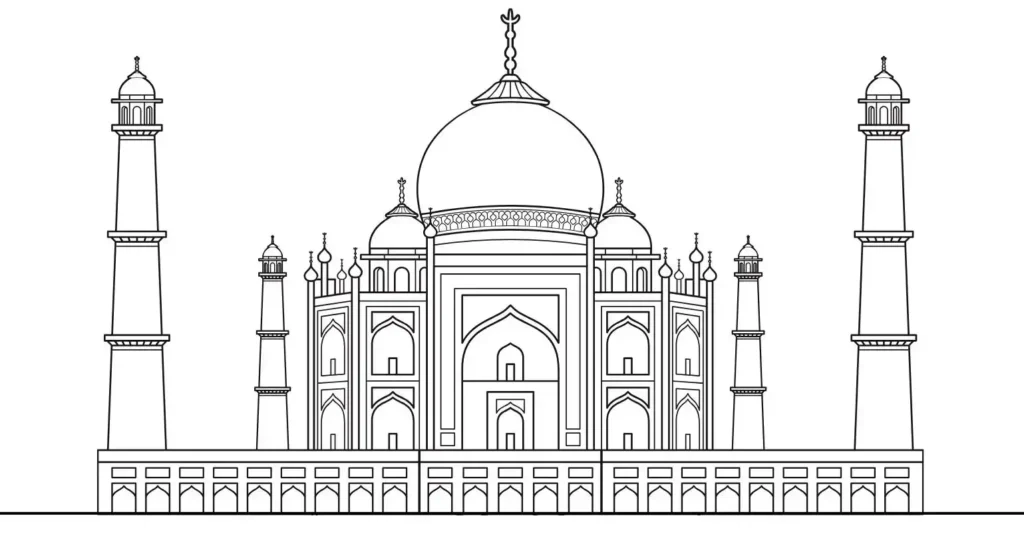
On each corner of the platform, draw a tall cylindrical tower (minaret) similar to the one from the previous step.
Keep all four minarets equal in height and width for perfect symmetry.
Divide each tower into three sections using horizontal lines, just like the first one.
Add tiny arched windows near the top of every minaret for elegant detail.
Draw a small dome and spire at the top of each minaret to complete their design.
Check the alignment from left to right to make sure all towers look balanced and identical.
Step 12: Draw the Pathway Leading to the Taj Mahal

Start from the bottom center of your page and draw two long diagonal lines extending toward the Taj Mahal.
Keep the lines evenly spaced to form the main walkway leading to the monument.
Inside this path, draw parallel inner lines to give a sense of depth and perspective.
Make sure the lines narrow slightly as they approach the Taj Mahal for a realistic look.
Review the entire drawing and darken the outlines of the Taj Mahal to complete the sketch.
Erase any extra pencil marks and clean up the final lines for a polished result.
Step 13: Draw the Garden and Final Details of the Taj Mahal

On both sides of the walkway, draw small rounded bushes to represent the garden.
Keep the bushes evenly spaced and uniform in size for a neat appearance.
Add a few layers of smaller bushes behind the front ones to create depth.
Sketch light lines on the pathway to show perspective and guide direction.
Outline the entire Taj Mahal once more to make it bold and clean.
Erase any extra lines and give your drawing a smooth finishing touch.
Step 14: Add a Tree to Complete the Taj Mahal Drawing
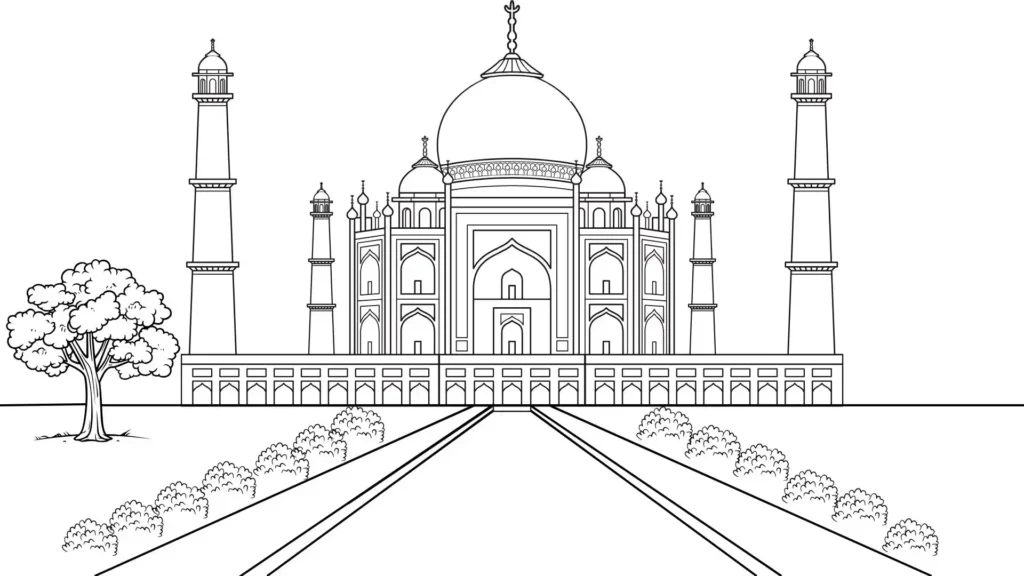
On the left side of your drawing, sketch a large tree with a thick trunk.
Draw several curved branches spreading outward from the center of the trunk.
Add rounded clusters of leaves to form a fluffy and full tree crown.
Keep the tree slightly tilted outward to balance the composition of your drawing.
Add a few roots or grass lines at the base to make it look more realistic.
Finally, review the entire sketch and darken the final outlines to complete your Taj Mahal drawing.
Step 15: Draw the Sun and Clouds Above the Taj Mahal
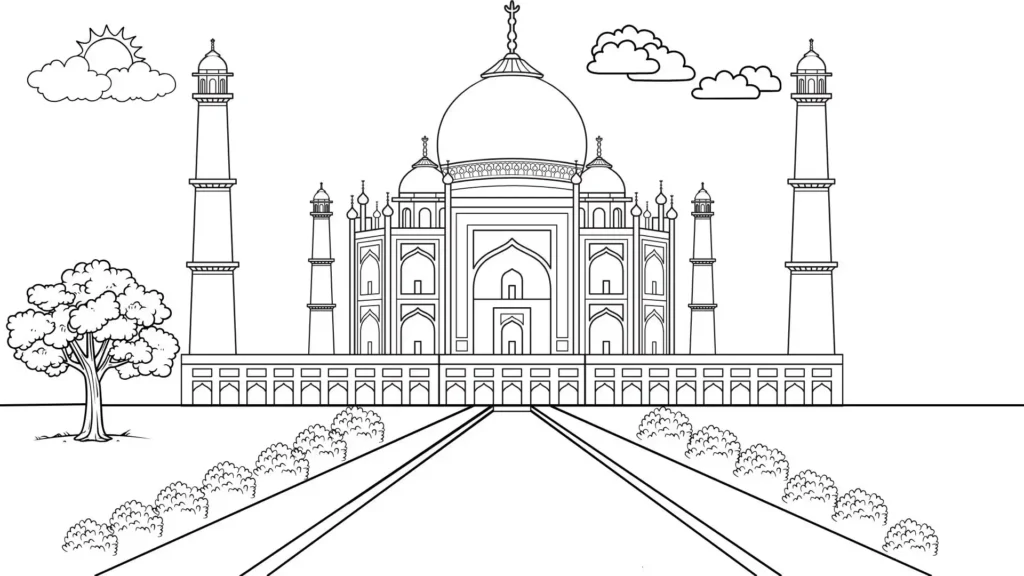
In the top left corner, draw a half-sun peeking out from behind a fluffy cloud.
Add curved rays around the sun to show brightness and daylight.
Sketch three soft clouds across the upper part of the drawing for balance.
Keep the clouds light and round to match the calm mood of the Taj Mahal scene.
Make sure the sky elements don’t overlap with the dome or towers.
Review the whole sketch and finalize your outlines for a clean and complete Taj Mahal drawing.
Step 16: Add the Final Title to Complete Your Taj Mahal Drawing
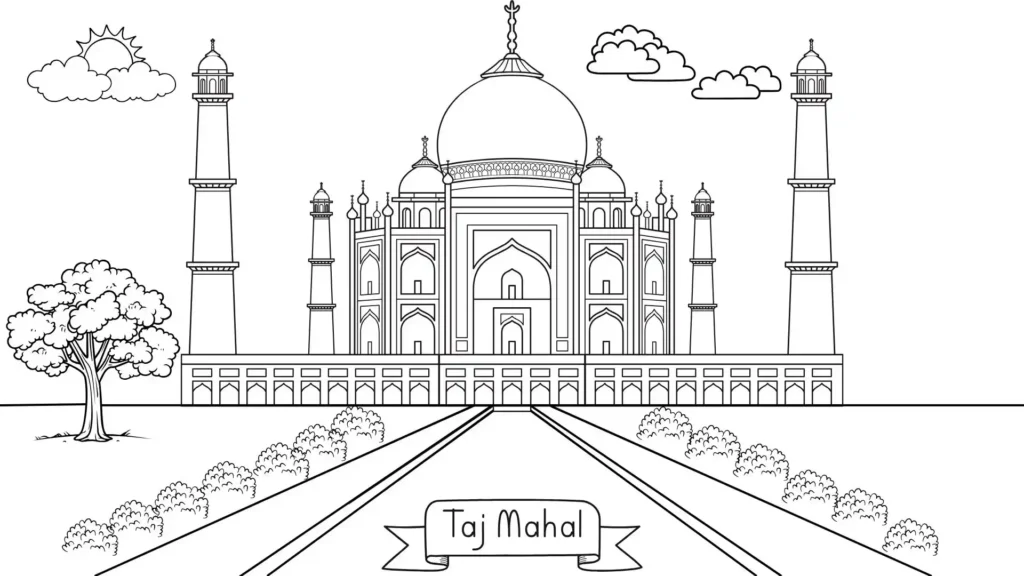
At the bottom center of your drawing, draw a banner strip with gentle curved edges.
Inside the banner, neatly write “Taj Mahal” in clear, bold letters.
Make sure the text is centered and evenly spaced within the banner.
Add a few fold lines or ribbons on both sides to make the banner look stylish.
Darken the outlines of the banner and text to make them stand out.
Review your entire drawing — from the dome to the banner — and make any small adjustments for a clean, finished look.
Step 17: Color Your Taj Mahal Drawing
Fill the sky with a light blue shade to create a bright and peaceful background.
Color the dome and minarets in soft white or light grey to show the marble texture of the Taj Mahal.
Use green shades for the grass and bushes on both sides of the pathway.
Color the tree with a brown trunk and lush green leaves for a natural look.
Fill the pathway water channel with a calm blue tone to represent reflection.
Add yellow to the sun and soft white to the clouds to complete the sky.
Finally, check your drawing and make sure the colors look even and balanced across the artwork.
Great job!
You’ve completed your Taj Mahal drawing step by step
You’ve just finished your Great Taj Mahal drawing! Each step built on the last to create something wonderful. Keep practicing, and you’ll be drawing Monuments with ease and confidence.
Taj Mahal Drawing: One view drawing process

Tips to Make Your Taj Mahal Drawing Look Even Better
- Start with light pencil strokes so you can fix proportions easily.
- Draw a vertical center guideline to keep your Taj Mahal drawing symmetrical.
- Take your time shaping the large central dome — it’s the main focus of the monument.
- Keep the four minarets evenly spaced on both sides.
- Add small arch details and window shapes for a more realistic Taj Mahal drawing.
- Use soft shading under domes and along pillars to create depth.
- If coloring, use white, light gray, and soft sky blue tones for a classic marble effect.
Frequently Asked Questions (FAQ)
Q1. How do you draw the Taj Mahal step by step?
Start by drawing a base rectangle for the platform. Then add the main dome in the center, followed by the side domes and minarets. Add arches, windows, and small decorative details to complete your Taj Mahal drawing.
Q2. Is the Taj Mahal drawing suitable for beginners?
Yes, definitely! This Taj Mahal drawing is beginner-friendly. Even if you’re starting, you can follow simple shapes and build the structure gradually. Just take your time and focus on keeping both sides balanced.
Q3. How can I make my Taj Mahal drawing look more realistic?
The key is symmetry and neat detailing. Since the Taj Mahal is perfectly balanced on both sides, try using a center guideline to keep everything aligned. Adding soft shading around the domes and under the arches will also add depth and realism to your drawing.
Q4. What colors should I use for a Taj Mahal drawing?
The Taj Mahal is made of white marble, so white and light gray shades work best for the main structure. You can add a soft blue sky, warm sunset tones, or green grass around it to make your artwork look more complete and lively.
Q5. Can kids try this Taj Mahal drawing?
Of course! Kids can absolutely try this. By breaking the structure into simple shapes like rectangles and curves, it becomes much easier to draw. It’s also a great idea for school art projects.
Q6. How long does it take to complete a Taj Mahal drawing?
A simple Taj Mahal drawing may take 20–30 minutes. Adding extra details and shading may take longer depending on your style.


Try or Download these Easy Coloring Pages!
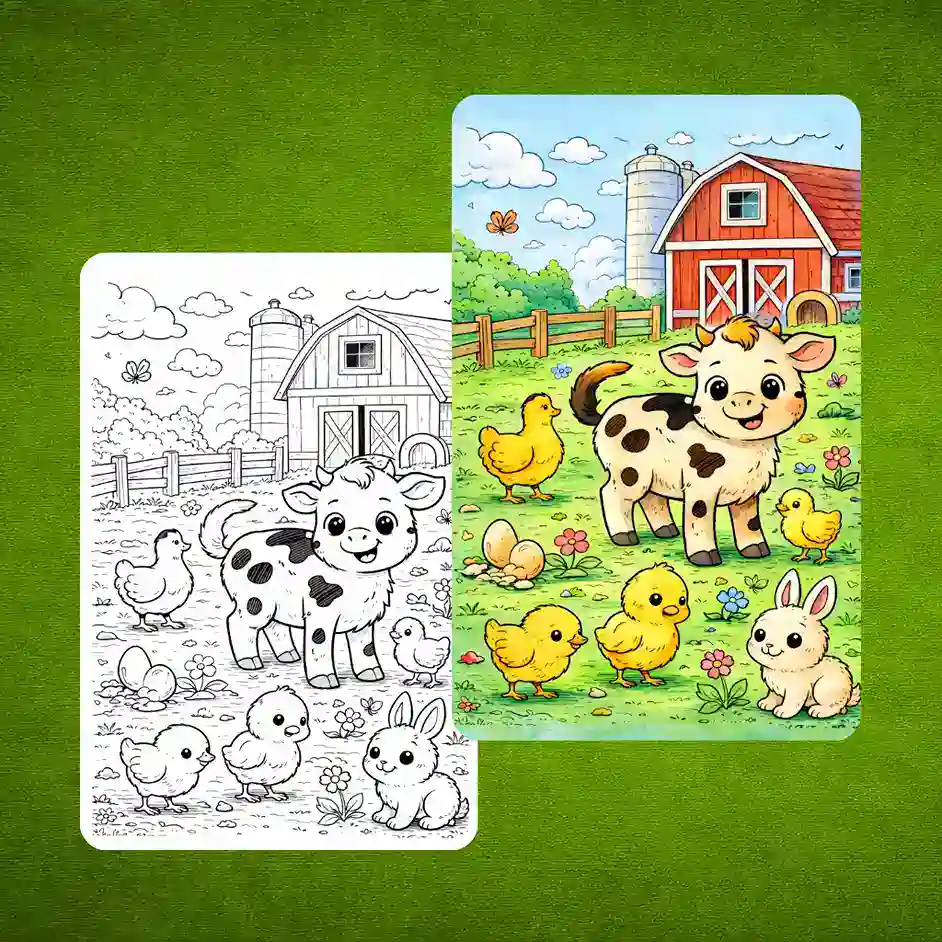
Christmas Special Drawings!
Learn how to draw simple and free step-by-step drawing tutorials for kids and beginners! On draweasyfun.com, you will learn how to draw animals, plants, objects, and popular cartoon characters with easy-to-follow instructions. So what are you waiting for! Check Out Now!